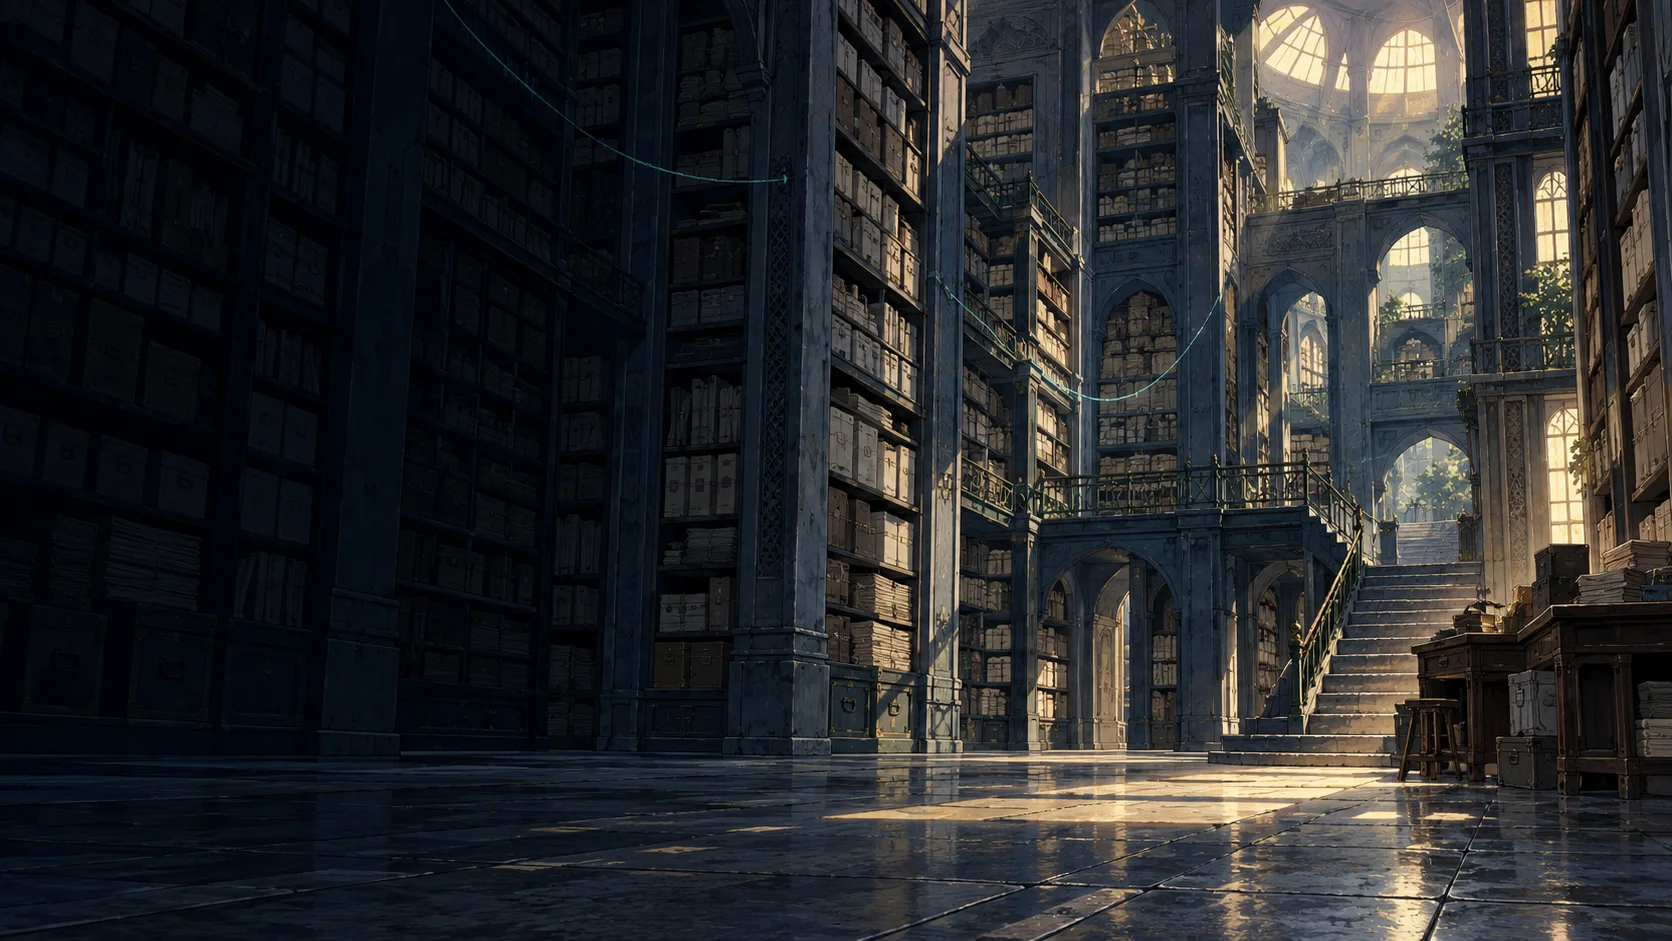
How I Built an Anime Portfolio: Step-by-Step Guide and Master Prompt
Build your own anime-inspired portfolio with a copyable prompt for Codex, Claude Code or Cursor. My process for character identity, connected scroll scenes, transformations, sound, an AI assistant and mobile review.
An anime portfolio works when the story, character art and interaction describe the person behind the work. On shihub.site, I wanted visitors to enter my world, meet the builder, watch him train, and then see what he has actually shipped.
I love Dragon Ball, Naruto, Attack on Titan, Code Geass and other anime. Goku is my favorite. That gave me a direction: curiosity, discipline, reinvention and the willingness to try something difficult. My audience is product clients and startup collaborators, so the story also needs to answer a practical question: what can this person help me build?
This guide follows the decisions and fixes behind my portfolio. You can use the master prompt below in Codex, Claude Code, Cursor, or your preferred coding agent to build a similar kind of experience around your own identity. The prompt starts the process; reference assets, browser review and repeated refinement turn it into a finished site.
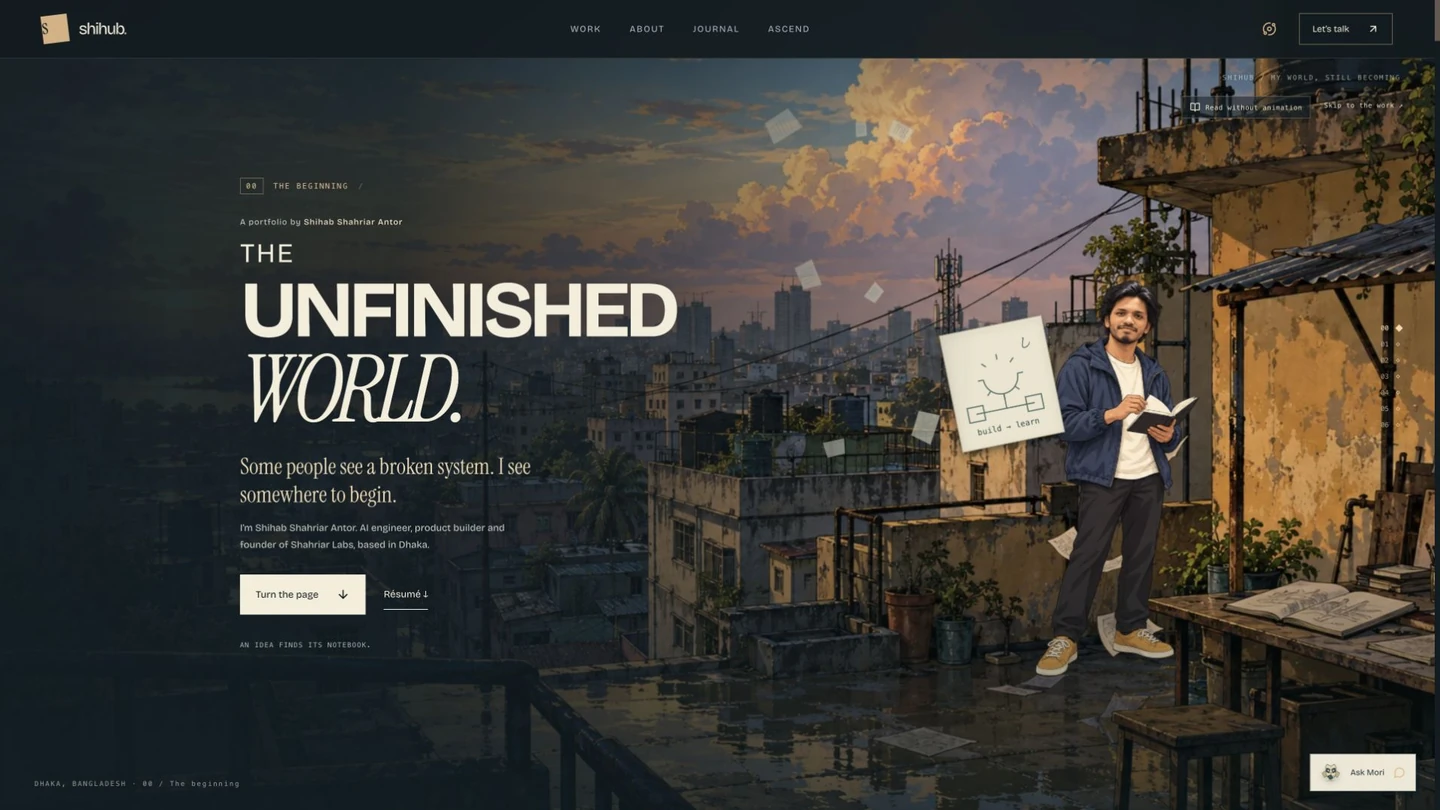
Step 1: Gather the material before designing
Create a project folder containing a clear portrait, your resume, project screenshots and a short content brief. Add a second portrait angle if you have one. Consistent reference material makes it easier to keep your face recognizable when you change clothing, pose and illustration style.
For each project, write down:
- The problem it solves and who uses it.
- What you personally built.
- A result you can support, or a clear description of the current status.
- The live URL, source repository and a complete screenshot.
- Any useful constraints, technical decisions or lessons.
For me, the real work includes products such as LetX, freelm and QuantumSketch. Those projects carry the professional argument. The illustrated scenes make people curious enough to reach them.
Prepare your public contact information, social profiles and the exact resume file you want visitors to download. Check the links now. An impressive interaction followed by a broken project link wastes the attention you earned.
Deliverable: a factual content brief, an asset folder and a verified link list. Give these to the coding agent alongside the prompt.
Step 2: Write a story that fits your work
Start with a sentence describing the experience: “Enter my world, follow how I think and train, then see the products I build.”
Next, map chapters to actual traits. My portfolio uses these connections:
| Chapter | What it says about me | What the visitor gets |
|---|---|---|
| Rooftop introduction | A personal world and an invitation | My role and a route to my work |
| Curiosity and invention | Ideas become experiments and tools | How I approach building |
| Discipline and strategy | Difficult problems need persistence and judgment | The mindset behind the work |
| Beyond the limit | There is always another way to improve | An interactive training metaphor |
| Built in the real world | The story has practical consequences | Products, screenshots and case studies |
| Contact | I am open to the next challenge | A useful way to collaborate |
You do not need every chapter. A photographer, researcher or designer should choose different metaphors. Copying my transformations without changing the story would make the result feel borrowed.
The hero and villain idea also needs a purpose. My fictional opponent can represent repetitive work, fragile systems or a loop I need to break. Destroying that obstacle has a connection to engineering. A random explosion has much less meaning.
Make a storyboard with the character position, copy position, beginning state, ending state and transition object for each chapter. Sketch desktop and phone versions separately. Ask the agent to propose this before generating a large asset collection.
Deliverable: a storyboard with a clear reason for every scene.
Step 3: Use the master prompt in your coding agent
Open your existing project in Codex, Claude Code, Cursor, or another coding agent. For a new project, create a workspace first. Attach your portraits and content brief, replace the bracketed fields, and paste the prompt below.
Choose the agent you are comfortable with. Its access to your files, browser tools and image-generation tools matters more than the name on the interface. If it cannot create assets, use its asset briefs in a separate image tool and bring the outputs back into the project.
Your world starts here
Replace the bracketed details, attach your references, then paste into Codex, Claude Code, Cursor, or your preferred coding agent.
Build an original, cinematic, anime-inspired personal portfolio with me as its protagonist. This is a professional portfolio for real visitors, with a coherent illustrated story and interactions that reveal my personality. Use this brief in Codex, Claude Code, Cursor, or another coding agent with access to my project files.

MY BRIEF — replace these fields before starting
Name: [YOUR NAME]
Brand / world name: [YOUR BRAND]
Domain: [YOUR DOMAIN]
Primary audience: [PRODUCT CLIENTS / EMPLOYERS / STARTUP COLLABORATORS]
What I do: [YOUR ACTUAL ROLE AND SPECIALTIES]
Personality: [THREE TRAITS AND A SHORT PERSONAL STORY]
Anime / visual inspirations: [FAVORITES AND WHAT EACH ONE MEANS TO YOU]
Portrait references: [LOCAL FILE PATHS OR ATTACHED PHOTOS]
Projects: [NAME, PROBLEM, YOUR CONTRIBUTION, VERIFIED RESULT, LIVE LINK, SOURCE LINK, SCREENSHOT FOR EACH]
Resume: [FILE PATH]
Contact and social links: [VERIFIED PUBLIC CONTACT DETAILS]
Existing repository / stack / hosting: [PATH AND CURRENT SETUP]
AI assistant: [OPTIONAL; PROVIDER AND SERVER-SIDE SECRET NAME, NEVER THE SECRET VALUE]
Budget and constraints: [TIME, ASSET BUDGET, SUPPORTED DEVICES, OPTIONAL SERVICES]

WORKING RULES
Read the repository instructions and applicable installed framework documentation first. Inspect the existing site, routes, content, assets, build scripts and deployment setup. Preserve unrelated work and user edits. Do not invent credentials, projects, job titles, testimonials, impact metrics, links, or contact details. Mark missing facts and ask only the questions that block useful progress. Do not install a large stack just because this brief mentions cinematic animation.

Before changing the visual design, present a concrete art-direction proposal and wait for my approval. Include a scene-by-scene storyboard, desktop and phone compositions, typography, palette, transitions, asset list, animation technique, performance compromises, and a rough prototype plan. If I have already approved a direction, continue within that direction. Do not publish, push, merge or configure external accounts unless I have authorized those actions.

PHASE 1 — CONTENT AND STORY
Map real aspects of my work to a short narrative: curiosity, invention, discipline, strategy, training, shipped work, and an invitation to collaborate. Choose only the chapters that fit my background. Each scene must tell a visitor something specific about me and have a visible next step. Define recurring visual motifs and a beginning, development and payoff.

Use anime as inspiration for staging, expressive poses, anticipation, speed, atmosphere and transformation. Keep my likeness and build an original world. Give me a different outfit where the story calls for one. My symbolic enemies should be relevant engineering obstacles such as brittle systems, repetitive work, confusing interfaces or fear of shipping. Explain the metaphor in the copy without pretending fictional powers are real professional achievements.

Avoid generic gradient cards, floating technology logos, decorative empty panels, filler copy, repetitive fade-ins, and unrelated spectacle. The work and contact information must remain easy to find.

PHASE 2 — STRUCTURE BEFORE EFFECTS
Build semantic pages with readable DOM text, real links, headings, project details, a blog, contact information and an accessible assistant if requested. Keep existing URLs where possible and map necessary redirects. Separate content data, visual scene configuration, renderers, playback state and optional audio. Make the site useful when animation or an asset fails.

Use the smallest rendering approach that achieves the design. CSS and SVG are good for simple effects. A layered Canvas 2D scene can animate illustrated assets with aura, particles, wind and parallax. Use a timeline library when it simplifies synchronization. Use WebGL or a rigged character only if the chosen interactions require it. Do not describe moving a single cutout as full character animation.

PHASE 3 — ASSETS AND IDENTITY
Create an asset manifest listing each scene, reference portrait, outfit, pose, background, foreground, effect layers, intended dimensions, alpha bounds, focal point and fallback. Preserve recognizable facial features, complexion, hairline and proportions across versions. Prepare separate backgrounds and transparent character cutouts when needed. Keep all hair, hands, feet, weapons and energy effects inside safe image bounds.

If image generation is available, show identity and style proofs before producing a large batch. If unavailable, list the exact assets and generation prompts I need to supply. Never claim an image or video was generated when it was not. Inspect outputs visually; remove halos, unintended transparency, hard crop edges and baked-in labels. Optimize web formats without making high-density displays visibly blurry. Do not hotlink images or assume third-party assets are licensed for my use.

PHASE 4 — ONE COMPLETE SCENE PAIR
First implement the opening scene and its transition into the next chapter. Build one persistent visual handoff: for example a loose sheet becomes a notebook page. Match its position, size, rotation, color and content at both ends. The object should mean something before and after the transition. Test slow scrolling, reverse scrolling, fast scrolling, direct anchor navigation, resizing and page restoration.

Derive scene position from normalized scroll progress, with clamped values and deliberate easing. Keep copy readable throughout. Preload the next necessary scene before it enters, release unnecessary resources, and stop animation loops when the scene is off-screen or the tab is hidden. Commit this milestone only when authorized, after reviewing the diff and verifying it in a browser.

PHASE 5 — TRANSFORMATION AND ACTION
Create a transformation chapter with [NUMBER] forms that represent learning or growth. Describe each form's visual identity, posture, aura behavior, palette, wind, sparks, pressure and sound character before implementing it. If I choose a Dragon Ball fan-art sequence, use the requested order: Super Saiyan, Super Saiyan 2, Super Saiyan 3, Super Saiyan God, Super Saiyan Blue, Ultra Instinct. These are fan-art references; my face and the professional story remain mine.

Do not only swap hair color. Give each form a distinct silhouette or pose, atmosphere, intensity and movement. Use bounded shake on decorative layers; never shake readable text or the entire page continuously. Offer direct form selection and a clear return to following scroll.

Keep scroll-driven playback separate from time-driven actions. An attack needs anticipation, charge, release, impact and recovery. The projectile must leave the character, reach a visible target, affect that target and finish in a stable state. A collected energy sphere needs a clear gather and throw. A beam needs a clear launch and hit. Repeated clicks, switching form, toggling sound, leaving the scene or scrolling must follow an explicit interruption policy and never freeze the character in a halfway frame.

PHASE 6 — SOUND AND ASSISTANT
Sound is opt-in. Unlock Web Audio from a real user gesture, resume a suspended context, confirm that audio is running before displaying "Sound on", and provide retry feedback when it fails. Use original or appropriately licensed effects. Synchronize cues with action stages, crossfade aura sound between forms, cap volume, and stop audio when the scene or tab is inactive. Do not add TTS unless I explicitly request it.

If an AI assistant is requested, give it an original mascot with idle, listening, thinking, answering and error states. Place the panel so it does not hide navigation or story controls. Support keyboard focus, closing, readable messages, phone keyboards, streaming failures and reduced motion. Ground answers in verified portfolio content. Keep provider credentials server-side. Limit body size, conversation size, response duration and output. Use a shared production rate limiter, return 429 with a meaningful Retry-After, and fail closed if the shared limiter cannot be checked. Never treat a per-instance memory map as a reliable production quota.

PHASE 7 — REAL WORK, PHONES AND ACCESSIBILITY
Show complete project screenshots at their natural aspect ratio or provide a clearly labeled detailed view. Do not crop away the UI that explains the project. Pair each project with its problem, my contribution and verified outcome. Make primary project and contact links obvious.

Design a separate phone composition instead of shrinking the desktop canvas. Reserve space for the character, place copy where it remains readable, simplify particles, preserve important poses and keep controls reachable. Check at least 320, 375, 412, 768, 1440 and 1920 CSS-pixel widths, recording the actual viewport used. Test high-density displays, landscape, browser zoom and a physical phone if available. Do not claim a device was tested unless it was.

Honor prefers-reduced-motion and provide a reading mode. The full story, forms and projects must remain accessible without continuous movement. Include keyboard controls, visible focus, sensible heading order, sufficient contrast, alt text for meaningful images and decorative-layer hiding. Optimize measured bottlenecks, load assets in stages and cap canvas pixel ratio based on visual quality and device cost. Do not promise an unmeasured frame rate or Lighthouse score.

PHASE 8 — REVIEW AND DELIVERY
Review every route, not only the home page. Verify project readability, image bounds, links, resume download, contact flows, missing assets, direct navigation, metadata, canonical URLs, sitemap, robots, article schema and honest visible content. SEO and answer-engine readability should come from semantic, specific content, not hidden keyword stuffing.

Run the project's required type checks, build and meaningful tests. Use actual browser screenshots to inspect desktop and phone layouts. Test transition boundaries in both directions and action interruptions. Test the chatbot quota with an isolated mock provider so tests do not spend real API credit; verify production behavior separately with a bounded check if authorized. Redact credentials from logs and artifacts.

Deliver the working preview, a concise change summary, real test results, remaining limitations and any manual configuration needed. Do not declare completion based only on a successful build. Work in small reviewable milestones: content, scene pair, assets, remaining chapters, transformations, assistant, mobile/accessibility, final polish. When authorized, commit each completed milestone and use the requested PR/review/deployment workflow.

START NOW
Inspect my materials and repository. Summarize what is known and missing. Then propose the storyboard and implementation plan for approval. Make the result specific to my identity and work, rather than copying the reference portfolio.
Prefer a file? Download the master prompt (.txt). Keep it with your portraits and project notes.
The first response should give you a concrete storyboard and implementation plan. Review the composition and story before approving implementation. If the response only promises “beautiful animations,” ask for the exact first scene, its transition and the phone layout.
Keep a copy of the filled-in brief. It is the reference you return to when an iteration drifts into attractive but irrelevant decoration.
Step 4: Build the readable portfolio first
Create the routes, headings, project information, contact links and resume download before the effects. A visitor should understand who you are and find your work even if the animation does not load.
My site uses Next.js and React for the page structure, with custom Canvas 2D renderers for the illustrated world and transformation effects. Semantic text and controls remain in the DOM. The canvas is a visual layer around that content.
This separation matters. Canvas can paint a dramatic scene, but real text gives readers selectable copy, normal links and accessible headings. It also lets the phone composition change without rewriting the whole animation.
Organize the code by responsibility:
| Responsibility | Example |
|---|---|
| Content | Biography, projects, contact details, articles |
| Scene configuration | Assets, focal points, chapter boundaries, palettes |
| Renderer | Background, character, aura, particles, transitions |
| Playback | Scroll position, selected form, action stages |
| Sound | Audio permission, aura loop, action cues, cleanup |
| Interface | Navigation, reading mode, form buttons, chat panel |
You do not need to use the same stack. CSS or SVG may be enough for a simpler site. A timeline library can help coordinate many properties. A layered Canvas 2D approach works well for illustrated effects; a rigged 3D character is a different project with a larger asset and implementation cost.
Deliverable: a complete, readable site skeleton with working navigation.
Step 5: Generate a consistent character, with useful layers
The portrait is the identity reference. Preserve the facial proportions, hairline, complexion and recognizable features while changing outfits and staging. On my site, using the same clothing in every scene quickly became repetitive, so each role needed its own costume and silhouette.
Generate a small proof set first: one civilian scene, one action pose and one transformation. Compare them side by side with the source portrait. Fix identity drift before producing the rest.
A useful asset brief looks like this:
Use the attached portrait as the facial identity reference. Create an original anime-style illustration of this person as a focused inventor, wearing a distinct workshop outfit. Preserve the recognizable face and complexion. Show the entire intended pose with generous space around the hair and hands. Deliver the character as a transparent cutout without text; produce the workshop background separately.
Keep backgrounds, characters and effects separate where you need them to move independently. A glow baked into the portrait cannot react naturally to a charge animation. A separate aura can.
Record the source dimensions, visible alpha bounds, focal point and intended scale for every cutout. Inspect the edges against both light and dark backgrounds. Check long hair, fingers, feet and anything that extends beyond the body.
We found a real Super Saiyan 2 crop problem in this project. The source composition differed from the other forms, so treating every image as the same rectangle produced the wrong framing. The fix needed asset-specific bounds and placement, including the still image used in reading mode.
Deliverable: inspected, optimized assets plus a manifest describing how to frame each one.
Step 6: Connect scenes through a shared object
One early transition on my site brought out a blank sheet of paper. The following section contained a notebook, but the relationship between them was weak. The sheet needed visible meaning and a continuous handoff.
A connected transition follows one object through both scenes. Give the page a sketch or note, move it into the next composition, then let it become the notebook page. Match the scale, angle, position and color at the join. The next scene should receive the object where the previous one leaves it.
For a tall chapter, a simplified scroll calculation is:
const clamp01 = (value: number) => Math.max(0, Math.min(1, value));

function chapterProgress(section: HTMLElement) {
  const bounds = section.getBoundingClientRect();
  const travel = Math.max(1, bounds.height - window.innerHeight);
  return clamp01(-bounds.top / travel);
}
Use this inside browser code after the element exists. It describes progress through a chapter whose visual stage stays in view; another layout may need a different start and end calculation.
Then derive the visual properties from that progress. For example, during the handoff interval, interpolate the paper between its rooftop position and its notebook position. Keep the coordinates in one agreed scene space so resizing does not make the paper jump.
Test the join slowly in both directions. Also jump directly to the next section. If it only works during one carefully timed downward scroll, the transition is incomplete.
Deliverable: one polished scene pair before expanding the rest of the story.
Step 7: Give each transformation its own atmosphere
The transformation chapter follows the requested fan-art sequence: Super Saiyan, Super Saiyan 2, Super Saiyan 3, Super Saiyan God, Super Saiyan Blue and Ultra Instinct, with my face throughout.
The design needs more than a new portrait color. Each form has a different silhouette, palette and effect behavior. These are the visual directions I use for staging the forms, rather than a claim to reproduce anime footage exactly:
| Form | Visual direction |
|---|---|
| Super Saiyan | Golden upward energy and a first surge of confidence |
| Super Saiyan 2 | Sharper pressure, lightning accents and tighter tension |
| Super Saiyan 3 | A larger silhouette and heavier, sustained energy |
| Super Saiyan God | Red warmth and a more controlled atmosphere |
| Super Saiyan Blue | Blue energy, cleaner motion and deliberate focus |
| Ultra Instinct | Silver light and an emphasis on calm, economical movement |
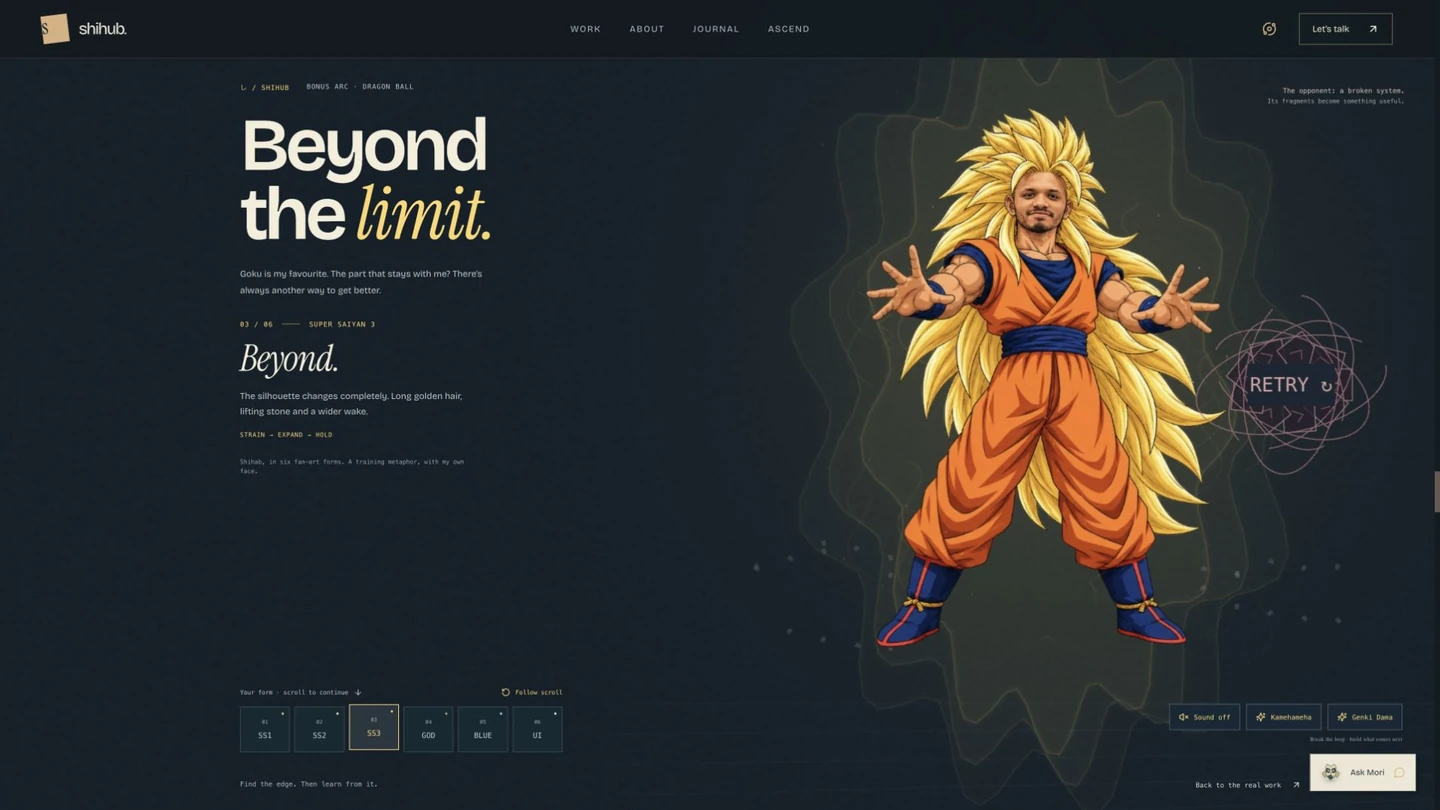
Build the aura in layers: a soft outer glow, a brighter core, moving wisps, occasional sparks, and wind responding to the intensity. Vary their speed and opacity together so the character appears to affect the surrounding air.
A pressure burst can briefly move decorative layers. Keep it bounded. Shaking paragraphs, navigation and buttons makes the site harder to use.
Provide direct form buttons as well as scroll progression. After manual selection, show a clear way to follow scroll again. In reading mode, preserve the form artwork and description without continuous movement.
Deliverable: six distinguishable forms with stable selection and readable copy.
Step 8: Animate actions with a separate timeline
The transformation chapter initially had an awkward failure: pressing an attack or sound control could leave the scene paused halfway through. Scroll position and action playback needed separate responsibilities.
Scroll determines the chapter and form. Time determines the attack sequence. The action moves through five stages:
- Anticipation: the pose and atmosphere signal what is about to happen.
- Charge: energy gathers at the hands or above the character.
- Release: the beam or sphere leaves its origin.
- Impact: it reaches a visible obstacle and changes that obstacle.
- Recovery: the effect fades into a stable scene.
A Genki Dama sequence needs a readable gathering phase and a throw. A Kamehameha needs a visible launch and a hit. Without those beats, the energy effect can look like a decorative light stuck beside the character.
Write an interruption policy before coding. Decide what happens when someone clicks twice, selects another form, scrolls away, disables sound or changes tabs. My interface allows scrolling to interrupt an action and return control to the page. Sound changes should not choose or freeze an animation frame.
Test the action at the beginning, middle and end of the chapter. Verify that it can finish without the user needing to scroll another pixel.
Deliverable: complete attacks that land, recover and handle interruptions.
Step 9: Make sound an optional part of the scene
Use a clear opt-in button. Browsers can suspend audio until a user gesture, so creating an audio context alone does not establish that sound is working.
In the click handler, create or resume the context and confirm its running state. Show “Sound on” only after that succeeds. Give the visitor a retry option if it does not.
Tie sound to action stages. A charge, release and impact should be distinct cues. The aura can be quieter and continuous while the scene is active, with changes between forms. Stop it when the scene leaves view or the tab becomes hidden.
My effects use synthesized audio rather than pretending to have extracted the original anime soundtrack. The site must still communicate every action with sound disabled. TTS is currently paused; an animated assistant does not require a speaking voice.
Deliverable: opt-in audio with truthful controls and proper cleanup.
Step 10: Build the assistant as a helpful character
My assistant, Mori, is an original origami owl. Its visual personality belongs to the site, but its job is practical: answer questions about my projects and help visitors find a useful next step.
Design the panel for idle, thinking, answering and failure states. Keep the input, send button and close control in predictable positions. Test keyboard focus and a phone keyboard. The panel should not cover the controls a visitor is trying to use.
The API uses Nebius with a server-side NEBIUS_API_KEY. OpenRouter remains available in the project setup but is not the active provider. Choose a provider and model available to your own account; verify the model identifier before configuring it.
Keep the system context grounded in your actual projects and biography. Bound the request size, conversation length, response length and stream duration. Return an explicit error when the upstream provider fails or produces no usable answer.
This site uses a Cloudflare D1 binding for an atomic, shared quota of seven valid attempts per IP per UTC day. D1 needs a database binding and counter schema, not another API-key secret. Preview counters are separate from production, and failed model requests consume a slot. A production rate limit needs shared storage. An in-memory counter can work in a local preview, but server restarts and multiple instances make it unsuitable as the only production quota. The limiter should reject excess requests before calling the model and stop paid requests if it cannot verify the quota.
Deliverable: a useful assistant whose personality, reliability and cost controls have all been considered.
Step 11: Show the real projects without hiding their UI
The story earns attention; the project section must turn that attention into evidence.
One mobile issue in this project was the way screenshots were cropped. A dramatic full-bleed composition can cut away the navigation or feature that explains the product. For project previews, show the complete capture at its natural aspect ratio, or provide a clear route to a larger detailed view.
Keep titles, descriptions and links readable on every project page. Check text against the actual artwork behind it, rather than checking the color values in isolation. Use a paper surface or a deliberate contrast layer where the image competes with the copy.
Describe the problem, your contribution and the result. If the project is experimental, say that. Specific information makes the professional part of the portfolio stronger.
Deliverable: a project section that works as proof, with complete screenshots and clear case studies.
Step 12: Design the phone version deliberately
The desktop version has room for wide staging, dramatic scale and layered scenery. A phone changes the composition, available memory and interaction space.
Do a separate layout pass. Reserve room for the character and place the copy where it does not collide with the face. Reframe the scenery, reduce effect density and keep the form controls reachable. Do not assume a smaller desktop canvas will solve it.
Review at 320, 375 and 412 CSS-pixel widths, then tablet and desktop sizes. Check landscape and browser zoom too. Record the actual browser viewport rather than relying on a device label.
High-density displays need enough source resolution and an appropriate canvas backing size. Raising pixel ratio improves clarity but also increases rendering cost. Look at both the image and the responsiveness before deciding on a cap.
Use reduced-motion support and a reading mode. Stop off-screen animation work and load heavy assets in stages. The first visible scene should not wait for every transformation asset to download.
The mobile composition has already needed several iterations, and I still consider it an area for refinement. Browser viewport checks are useful evidence, but they do not establish how every physical phone performs. If you can test on the device your visitors use, do it.
Deliverable: a phone composition reviewed on real content, with honest performance limitations.
Step 13: Test the joins and failure cases
The bugs that mattered were often small: a blank transition page, unexplained panels, text competing with a portrait, a clipped cutout, or an attack stopping between poses.
Use a review list with observable results:
- Does the opening state show the role and a useful route to the work?
- Does every transition connect without a jump during reverse scrolling?
- Do all character boundaries remain intact, including long hair and hands?
- Do attacks release, hit a target and recover?
- Does sound enable only when audio really starts?
- Does reading mode preserve the information and interactions that matter?
- Does the assistant handle provider errors, quota exhaustion and interrupted streams?
- Can a visitor navigate directly to every project and article?
- Do the resume, contact links, images and social profiles work?
- Are titles, canonical URLs, the sitemap and visible structured content correct?
Ask your agent for screenshots and test results, then inspect the screenshots yourself. A successful build does not detect a forehead covered by a heading.
Step 14: Deploy the architecture you actually built
This site exports the Next.js interface as static files and runs the chat API as native Cloudflare Pages Functions. Those are separate parts of the deployment.
For this repository, the Pages build command is npm run build, the output folder is out, and the production branch is master. Do not copy those settings without checking your own repository. Server-rendered features need a different deployment arrangement.
Configure provider credentials as server-side secrets. After deployment, verify the live article, project routes, downloadable files and chat endpoint. A local preview cannot confirm that production secrets and runtime bindings are configured correctly.
The Next.js static export guide explains the static side. Cloudflare Pages Functions documentation covers the API side.
Commit completed milestones, review the final diff, and use a preview deployment before changing production. Keep a rollback path to the version that already works.
Refinement prompts for the second pass
After the first working build, give the agent a specific problem and a visible acceptance condition. These prompts are useful starting points.
For a disconnected transition:
Review the join between the opening scene and the invention chapter. Track the same paper object across the boundary, including its visible content, scale, position and angle. Fix discontinuities during slow scrolling, reverse scrolling, direct anchor navigation and resizing. Show screenshots at both ends and explain the coordinate model.
For a cropped character:
Inspect every character asset and its actual alpha bounds. Review its canvas placement, CSS fallback and phone composition. Fix clipping of hair, hands, feet and energy effects without stretching the image. Verify every form in animated and reading modes; do not assume their source dimensions match.
For attacks that freeze:
Separate scroll state from time-based action state. Define anticipation, charge, release, impact and recovery. Test repeated clicks, form changes, scrolling, leaving the scene and sound toggles. Ensure the projectile reaches a target and recovery returns to a stable state. Add tests for the playback transitions that caused the bug.
For a generic first draft:
Compare this build with my approved storyboard and factual content brief. Identify decoration that does not express my identity or help visitors understand my work. Replace filler with specific story beats, purposeful transitions and real project evidence. Propose the changes before altering the art direction.
For the final review:
Review every page at desktop and phone sizes. Check copy contrast, cutout bounds, complete project captures, keyboard access, reduced motion, failed asset loads, streaming errors, rate limits and contact links. Report defects with screenshots or reproducible steps. Fix them in reviewable milestones and state anything you could not verify.
What I would do first if I started again
I would build the opening scene and one connected transition before producing all the artwork. That small slice exposes the hardest decisions early: identity consistency, character placement, scroll behavior and how the story meets the real content.
Then I would polish one transformation and one complete attack. Once those work under interruptions and on a phone layout, expanding the system becomes much more predictable.
Use the master prompt to establish direction, then refine with evidence. Bring your own face, projects, interests and standards to it. That is what makes the portfolio your world.
You can explore the live site and the source repository. If you build something from this guide, I would love to see the world you make.
Questions & answers
Can I use the master prompt with Codex, Claude Code or Cursor?
Yes. Replace the bracketed fields, attach your portraits and project notes, and paste it into your preferred coding agent. Review its storyboard before implementation. Image generation and browser testing depend on the tools available to that agent.
Will one prompt generate a finished anime portfolio?
The prompt establishes the brief and workflow. A polished result still needs inspected assets, connected transitions, responsive layouts and repeated browser review. It should reflect your own identity and projects.
Do I need a 3D character for scroll animation?
No. This portfolio uses layered illustrated assets and custom Canvas 2D effects. Full articulated character motion needs additional poses, a rig or another animation approach; moving one cutout does not provide it.
Does the portfolio need sound or a paid AI assistant?
No. The story and work should remain usable without either. Sound is opt-in, and an assistant is optional. If you add one, keep its credentials server-side and enforce a shared production quota.